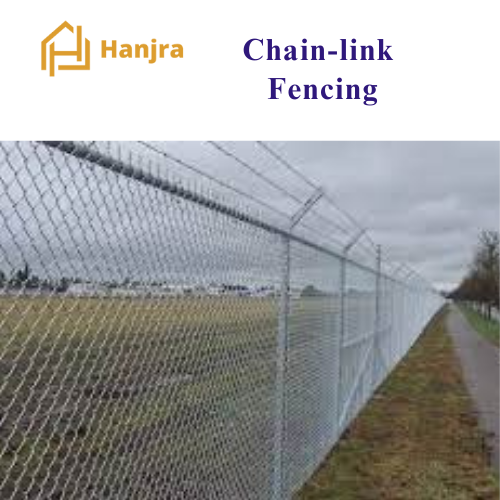
Hanjra Constructions specializes in tailoring chain link fencing to meet the unique needs of our valued clients. Our experienced team, with years of expertise, ensures a smooth and efficient installation process.
We offer various options, including different heights, mesh sizes, and materials, allowing you to customize your fence.
Our goal is to enhance the security and aesthetics of your property, just like a precast boundary, whether it’s for homes, businesses, or industries. We carefully place sturdy posts and expertly weave the chain link mesh, creating a durable and attractive pattern.
We pay close attention to every detail and can add extra elements in chain link fencing for stability if needed.
At Hanjra Constructions, we understand the importance of a correctly installed chain link fence, and we take pride in delivering a reliable and professional service that enhances your property’s security and appearance.
How to Install Chain Link Fence
Step 1: Calculate How Much Material You Need
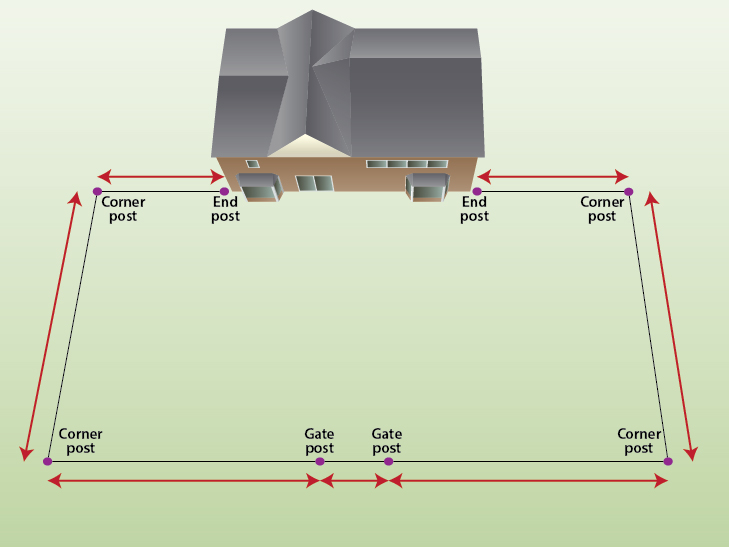
Mark the exact spot where you want to locate the corner, gate and end posts with spray paint or something similar.
Measure the total length between the end posts before fitting the chain link fencing.
You will now be able to order the correct length of fencing you need (normally shown in meters).
Step 2: Marking and Installing End Posts
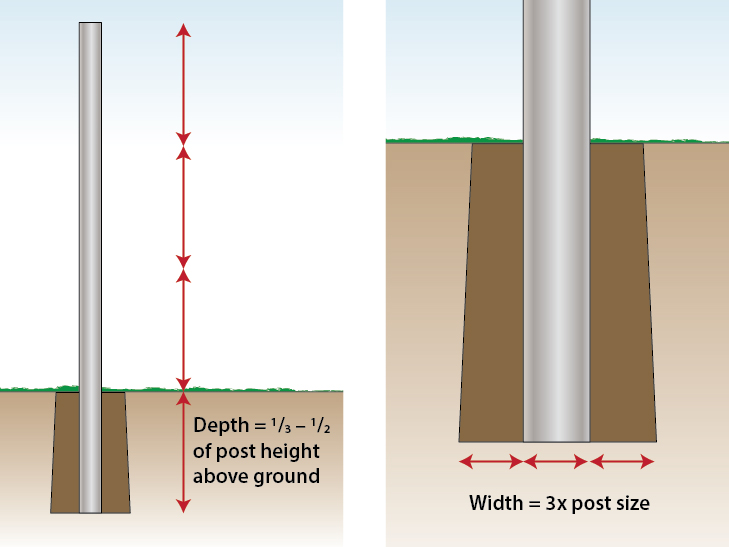
Using a spade dig a hole for each of the corner, gate and end post locations.
The holes should be three times wider than the posts.
The depth of the hole should be 1/3 the length of the post.
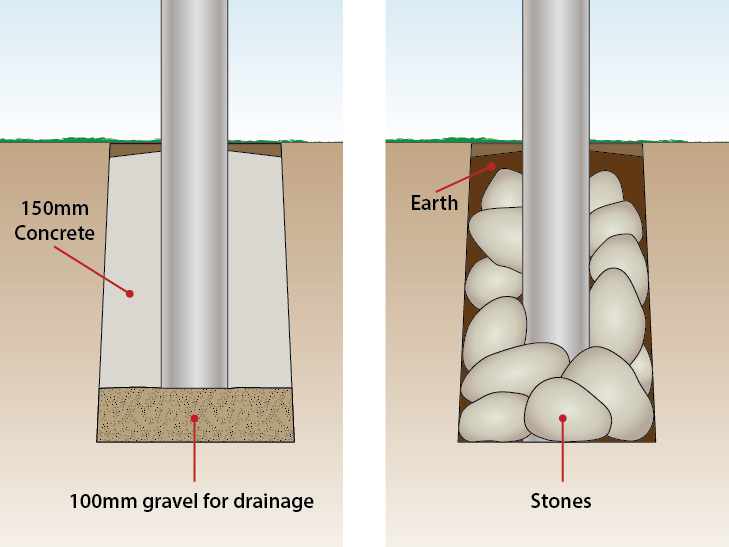
Fill the holes using one of the following options
CONCRETE: For best results fill the holes with 4 inches of gravel and pat it down so that it is compact then add 6 inches of concrete on top. Then put the posts into the wet concrete and allow at least 1 day for the concrete to set. Fill the rest of the hole with dirt.2)
WITHOUT CONCRETE: Put the pole in the middle of the hole then fill the hole full of large stones to hold the pole in place. Then add earth until tight and compact.
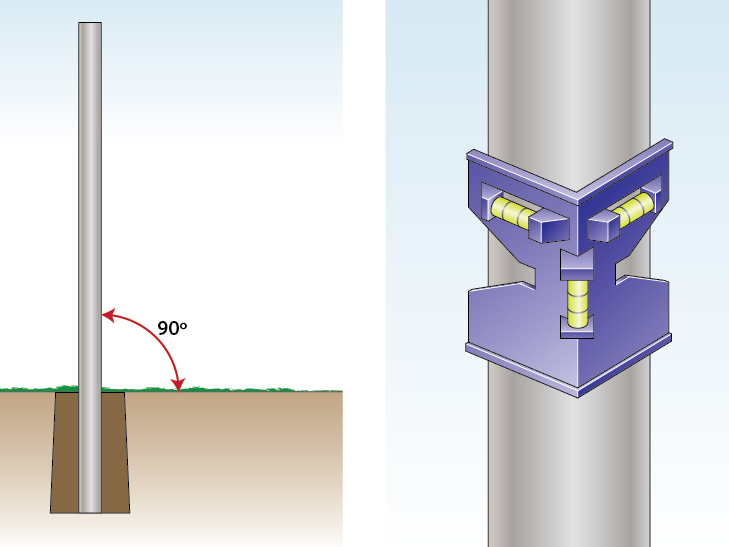
IMPORTANT Use a level to make sure the post is straight, then secure it in place. This is important otherwise your chain link fencing will not be straight.
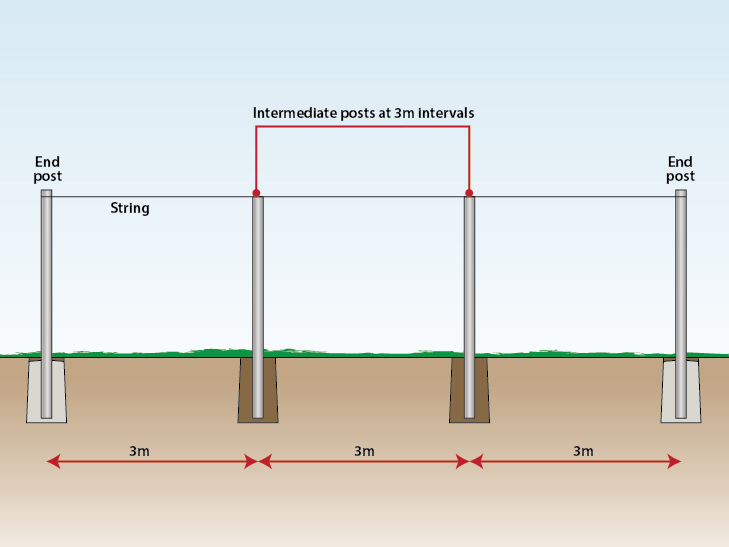
Step 3: Marking and Installing Your Intermediate Posts
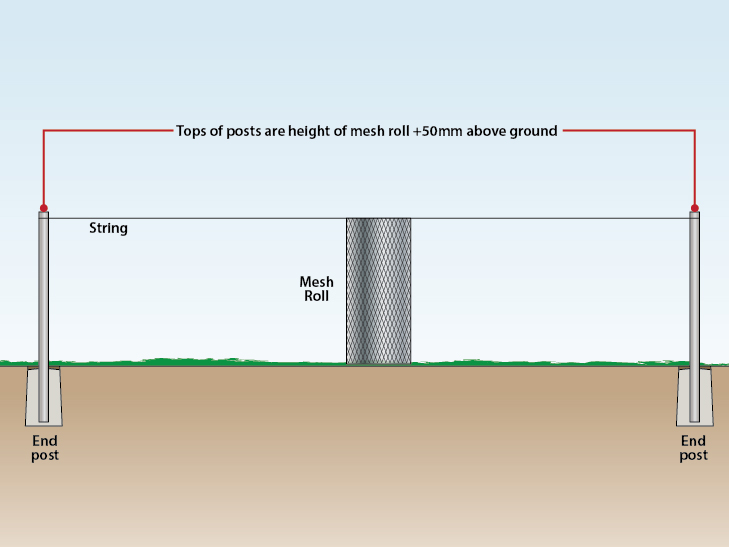
Tie a string tight between your posts.
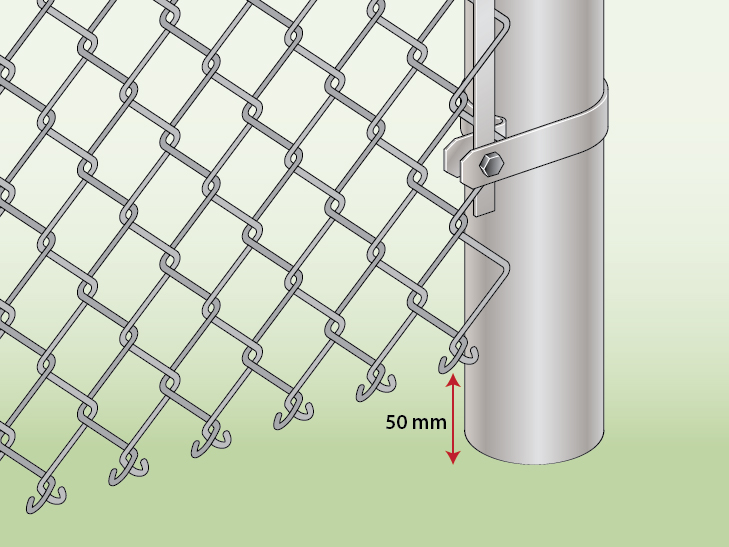
The height of the intermediate posts should be the height of the mesh + 50mm (2 inches) so that you have a small gap at the bottom of the fence once it has been installed.
Mark 3 meters gaps between the corner, gate and end posts which will mark the location of your intermediate posts.
Dig a hole in each of the middle post locations.
The holes should be three times wider than the post diameter.
The depth of the hole should be 1/3 the length of the post.
CONCRETE OPTION: For best results fill the holes with 4 inches of gravel and pat it down so that it is compact then add 6 inches of concrete on top. Then put the posts into the wet concrete and allow at least 1 day to allow concrete to set.
WITHOUT CONCRETE: Plant the pole then ram the hole full of large stones. Then add earth until tight and compact.
IMPORTANT:
Use a level to make sure the post is straight, then secure it in place. Otherwise, you will have a wonky fence.
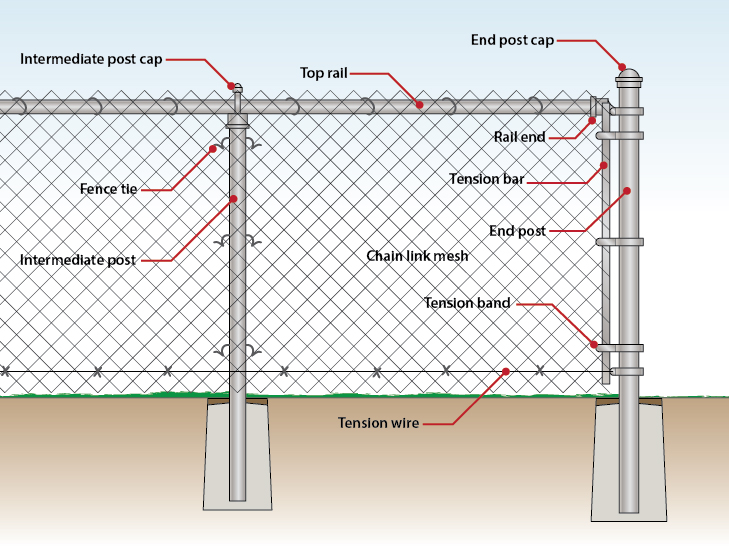
Step 4: Add Tension Bands and Caps to the Posts
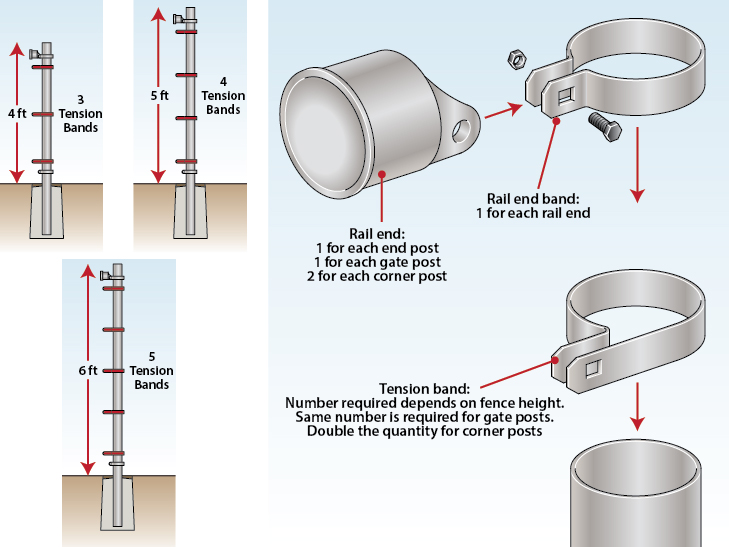
Add tension bands to all posts with the flat side pointing to the outside of the fence.
If you have corner posts you will need 2 x tensions bands pointing to either side.
You need to add one less tension band than the height of the fence, in feet. For example
4 feet high fence = 3 tension bands 5 feet high fence = 4 tension bands 6 feet high fence = 5 tension bands
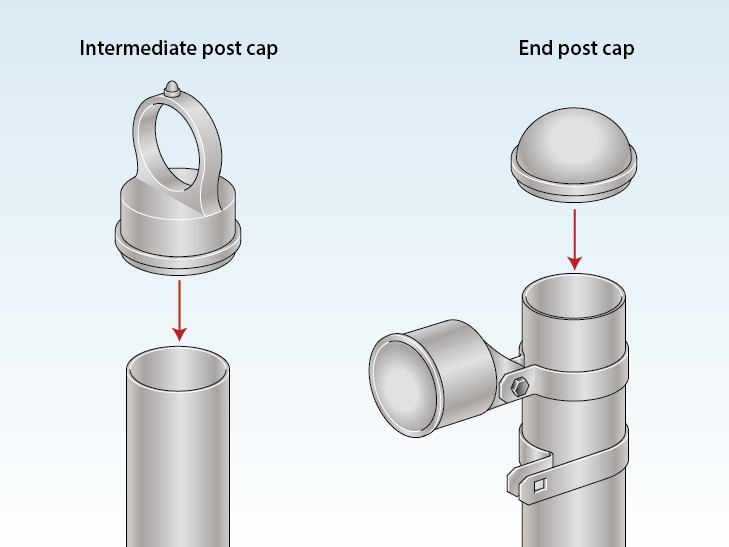
Add the caps to all posts as follows
Caps with loops = middle posts (allows the rail to go through)
Caps without loops = end posts
Start to tighten all nuts and bolts but leave some slack to allow for adjustments later.
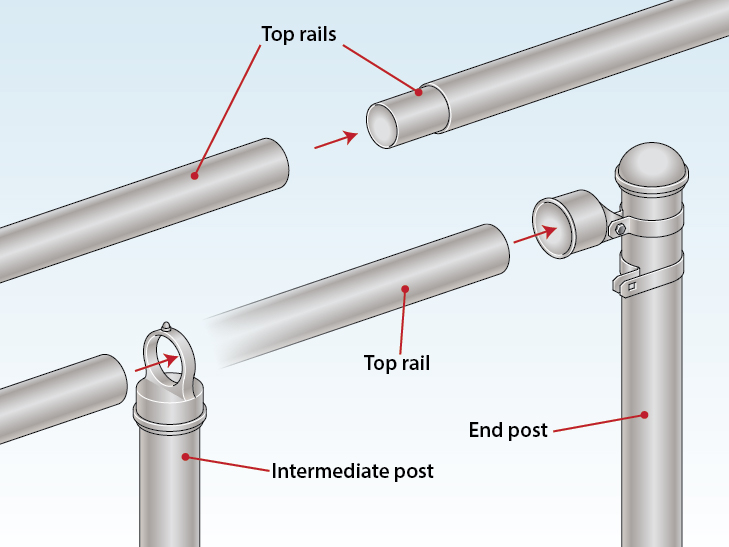
Step 5: Install the Top Rail
Push the top rails through the loops in the caps.
The poles will attach to each other by pushing the opposite ends together.
If the poles are too long, cut them with a hacksaw.
Once the poles are in place, fasten all the nuts and bolts.
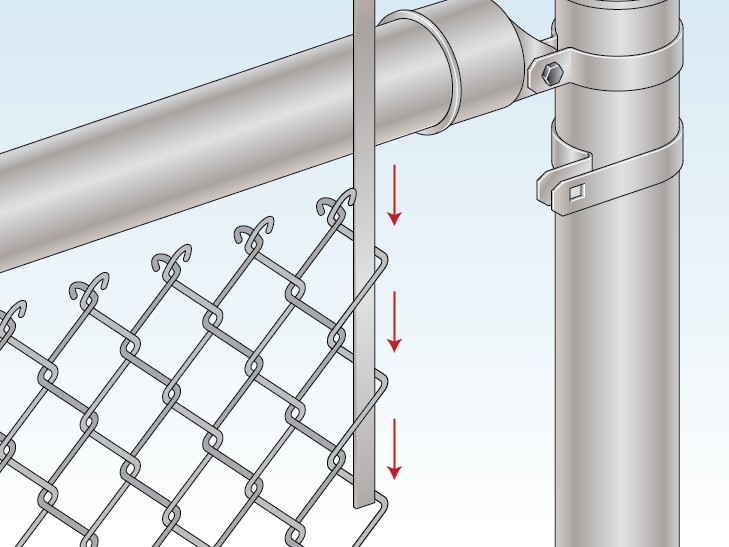
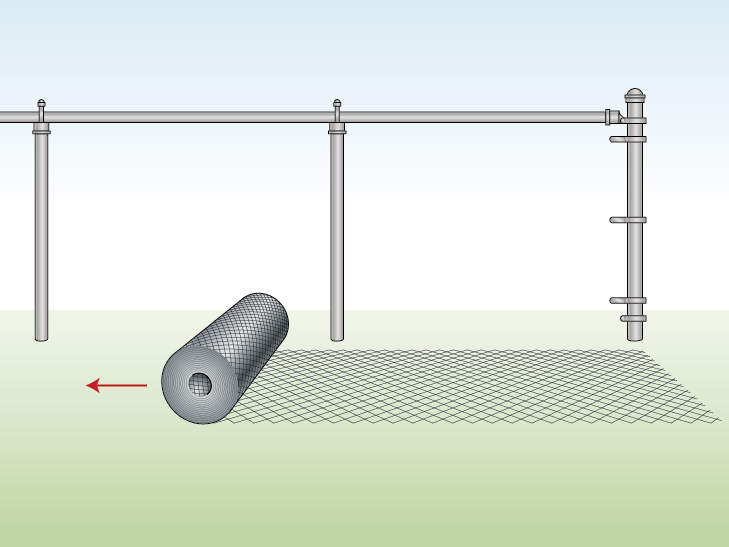
Step 6: Hang the Chain Link Mesh
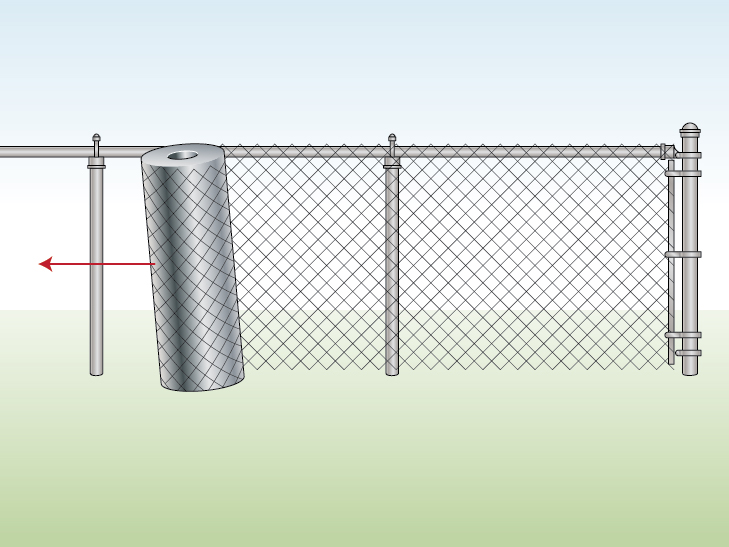
Starting at one of your end posts start to unroll your mesh along the length of your chain link fence.
Thread the tension bar through the end of the mesh roll closest to the end post.
Attach the tension bar to the bottom tension band of the end pole.
The mesh should also be 2 inches off the ground. If not adjust the height of your tension bands then tighten the bolts.
Pull the mesh roll tight along the length of the fence removing any slack. At this point you only need to remove slack, you are not permanently tightening the fence yet.
Add a few wire fence ties to attach the mesh to the top rail.
Step 7: Stretching the Chain Link Mesh
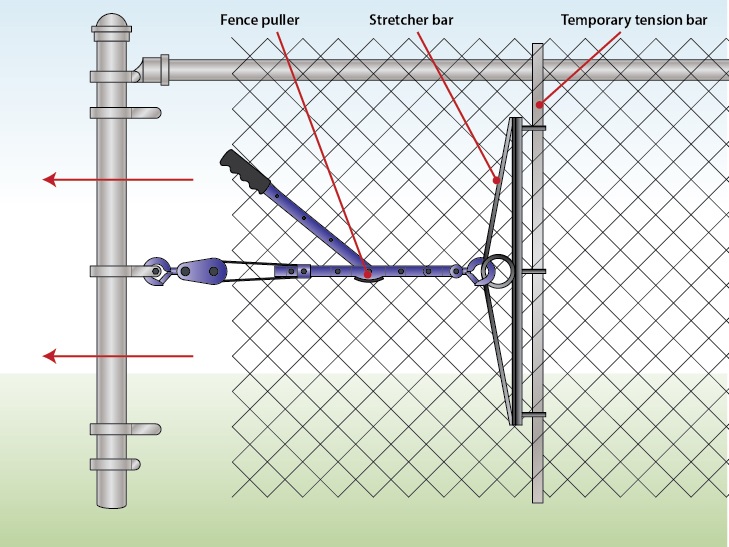
Weave a temporary tension bar about 3ft from your end post.
Then attach a stretcher bar to the tension bar.
Attach a fence puller to the stretcher bar and the end post, then crank the tool to tighten the mesh.
The mesh is tight enough when you can squeeze around 2-4 cm with your hands in the tensioned area of mesh.
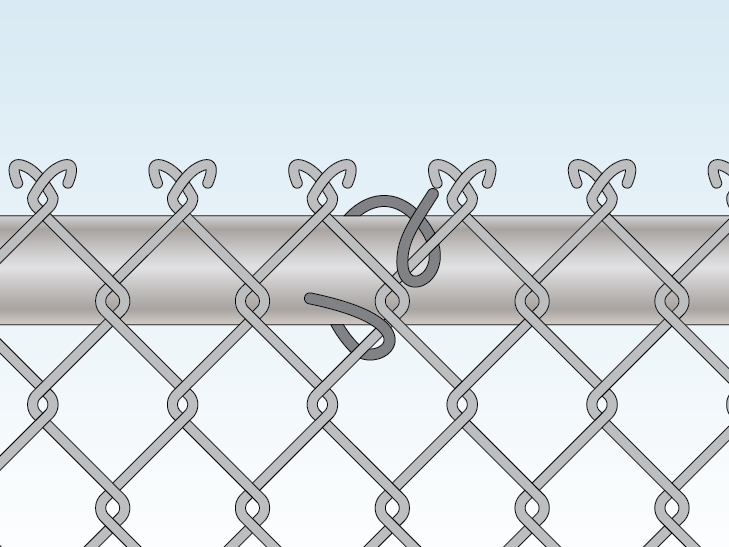
As you tighten the mesh, there is likely to be excess mesh that you will want to remove after the completion of the chain link fencing installation.
Open a strand of wire from the mesh to remove the excess.
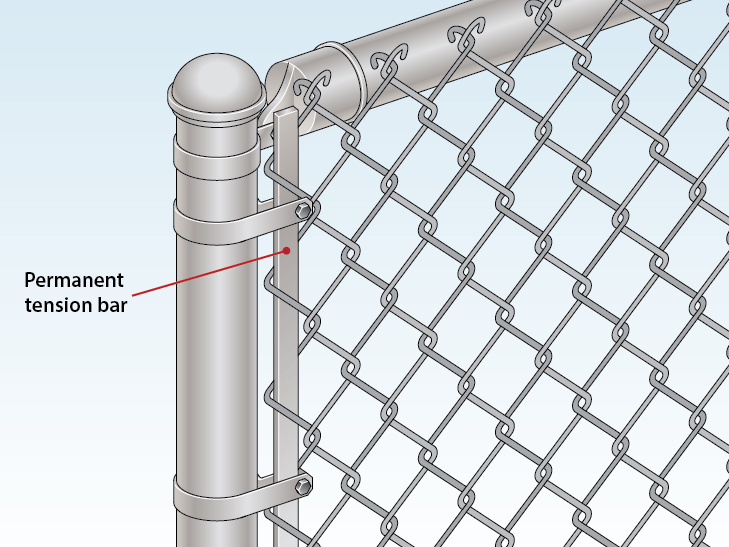
Thread the permanent tension bar through the mesh and tension bands attached to the remaining end pole.
Then tighten the tension band nuts and bolts.
Then remove the temporary tension band.
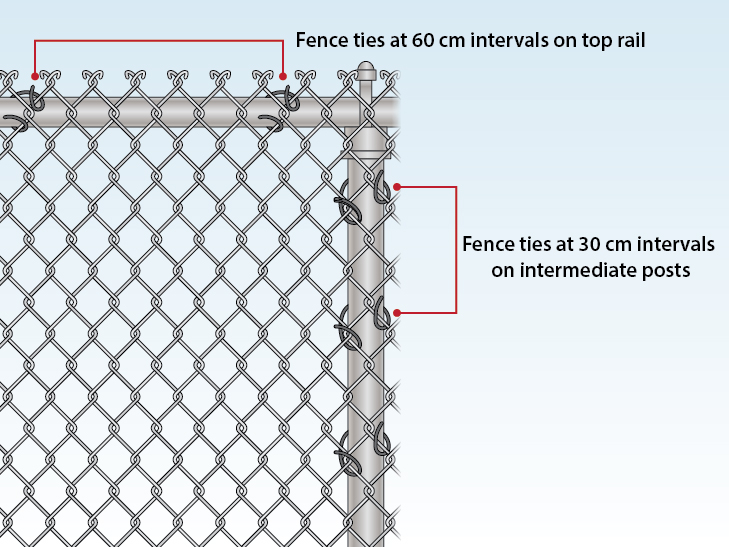
Secure the mesh to the rail and poles with fence ties.
Space your ties as follows (this doesn’t need to be exact).
24 inches along the rail 12 inches on the line posts
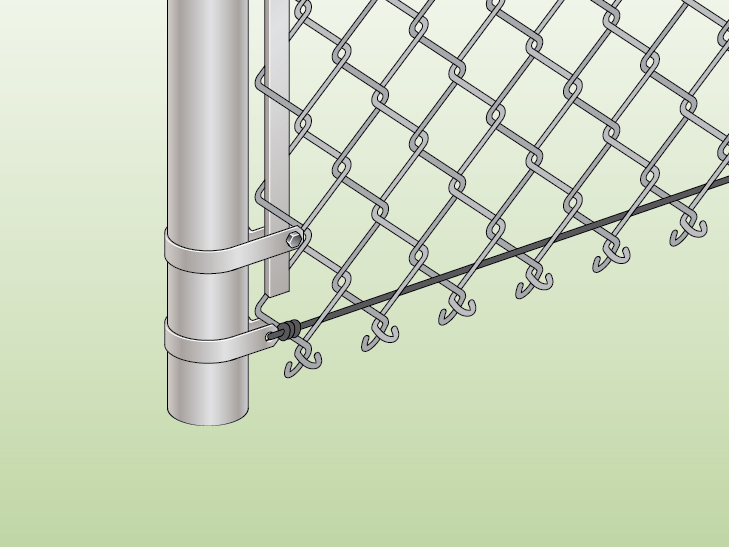
OPTIONAL (prevents animals from getting under your fence). Thread tension wire through the bottom of the mesh along the length of your chain link fence. Then pull tight and tie to your end posts at the end of the chain link fencing installation process.